26 Mar Sourdough bread
Although i have been making sourdough for about 2 years this is the first time i have posted a recipe. Many people think it is difficult but the process is very simple however it is long and there are a lot of variables on how it might turn out. This is part of the addiction of making sourdough as no loaf is ever the same. It can depend on many things, the starter, the flour, too much or too little water, the temperature of your kitchen, the weather outside, the list is endless but that is the beauty of making this bread.
When I first started I made many breads that resembled frisbees or pancakes but each time I baked I got better and better results, it becomes compulsive trying to get the perfect loaf I promise you! I still have hiccups and wonder what did I do wrong but thats all part of the fun!
This is my basic recipe but please read carefully and you can of course access lots of info on line regarding sourdough. If you have any questions you can email me on liz.leagaun@gmail.com
The starter
This is simply made from flour and water. I like to use dark rye flour but you can use white or wholemeal or a mix of flours. I followed the method from www.riotrye.ie when i first started and I would still recommend this method.
This takes place over 7 days. You start with 50g flour and 50ml water and mix them together into a paste.
Loosely cover with some cling film, make a few holes with a fork as you want to attract natural yeasts in the air.
Leave the starter in a warmish place, an airing cupboard, above a range cooker or on top of your fridge but not in direct contact with heat.
Leave it the next day (day 2) but on day 3 feed it again with 50g flour and 50ml water.
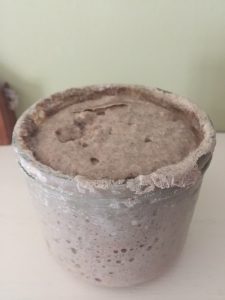
Do this for the next 4 days and as you will end up with too much starter at this stage weigh it and discard half on about day 5. So if you have 100g left feed it with 100g flour and 100ml water. At this stage it should start to smell like rotting apples slightly sweet with a tinge of a smell of nail varnish remover. By day 7 it should be bubbly and risen. (if your’e confused by my instructions please look at the riotrye.ie method).
Once you have made your starter when you are about to use it it should look like this.
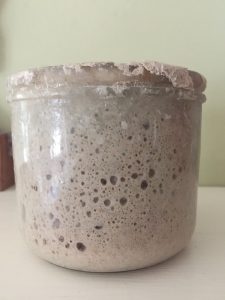
I like to keep around 100g starter in my fridge so when i know i’m gong to bake I take it out of the fridge and feed it with 100g rye flour and 100ml water first thing in the morning. it is the consistency of thick whipped cream.
By the time I start to bake about 2 pm it is risen and bubbly like the pics above. After using its best to top it up again with more equal amounts flour and water so it is ready to use next time. In between bakes I store it in the fridge. I use a glass jar with cling film over the top secured by an elastic band as sometimes the fermentation increases the size of the starter so much it overflows and a lid doesn’t work. You will find what works for you.
The Bread
This is the recipe that works for me and I do like to use some wholemeal in my loaves as although using all white gets you spectacular results I don’t like to use and eat all white flour loaves all the time. There are so many recipes on the internet and once you start making sourdough its a good idea to look at some of them and try out different recipes until you find one that works for you.
This recipe is for 500g loaf which relates to the amount of flour you use not the weight of the cooked loaf. I like to use Doves farm or Wessex Mill but there are lots of other makes which will be fine but it really needs to be a strong bread flour. My recipe also varies depending on what flours i have and this recipe has evolved from many I have followed on the internet. I start at around 2pm and finish by baking it the folowing day around 8 am but you can vary the times to suit your routine.
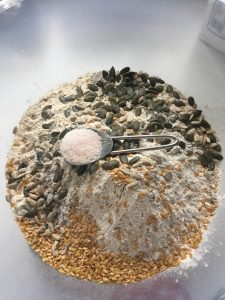
200g strong white bread flour
100g strong wholemeal bread flour
100g Malthouse or granary flour
100g mixed seeds I use sunflower, pumpkin and flax or linseed
320ml barely warm water – filtered water
7g sea salt
100g bubbly starter
If you have a scales that you can put the bowl on and weigh in the ingredients this will be very useful. Add the starter and water to a bowl and roughly mix together.
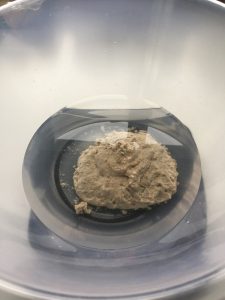
Then add all the flour, seeds and salt to the starter.
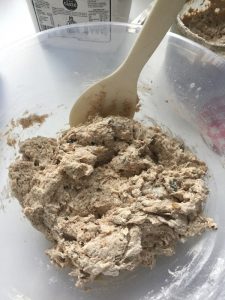
Mix it together roughly. It will look like this.
Leave it in the bowl for 1 hour covered with a damp tea towel or a plastic shower cap. This stops it getting dry.
Then using your hands pick up some dough and stretch it up to fold over the rest of the dough doing a small turn of the bowl each time and continue around bowl lifting and stretching the dough for about 20 times this is known as stretch and fold. You will notice how the dough gets more pliable and stretchy after this. It is working the gluten. Place the cover back on and do this 4 more times over the next 4 hours but it will now only need 4 stretch and folds each time.

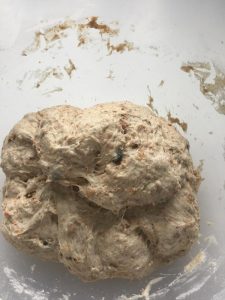
After the 4 hours of S&F, it will look like the pic below. This is called the bulk rise or bulk ferment.

It will puff up and look like this.
Now you will need to shape it. Flour your work top with a little wholemeal or white flour. Pull the dough onto your worktop gently so as not to deflate it too much. Use your fingers or a spatula. Shape it into a round, a little bit like the S&F’s by pulling the edges of the dough in towards the middle. Flip it over and shape with both hands pulling the dough towards you, this is easier if the worktop isn’t too coated with flour you need an bit of resistance.
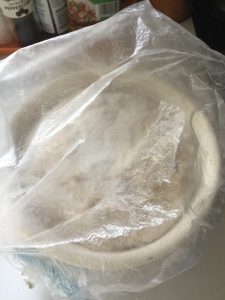
So for its next rise I use a 19 1/2 cm diameter banneton which is a bamboo basket that gives the sourdough it shape and lines, which I flour with lots of rice flour this stops the dough sticking. You can also use a liberally rice floured tea towel inside a bowl to do the same thing. With floured hands pick up the dough cupping your hands around it and place in your bowl or banneton seem side up and smooth side down.

Then you need to leave it on your counter top covered with a damp cloth or shower cap for a further 3 hours to rise a bit more like the pic below.
Its last ferment or rise happens in the fridge overnight, so if you start the whole process at 2 pm, you can stretch and fold plus 1 hour rest till 7 pm then shape and leave on the counter for further 3 hours till 10 pm. Then transfer to your fridge until the morning. I usually remove from the fridge at around 8 pm. Now you need to transfer to a casserole dish to bake.
The casserole dish creates steam as it bakes which helps the bread rise and create a nice texture and the crust doesn’t burn.
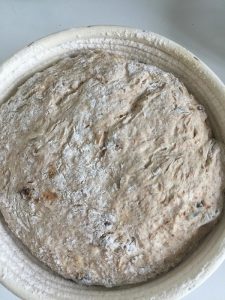
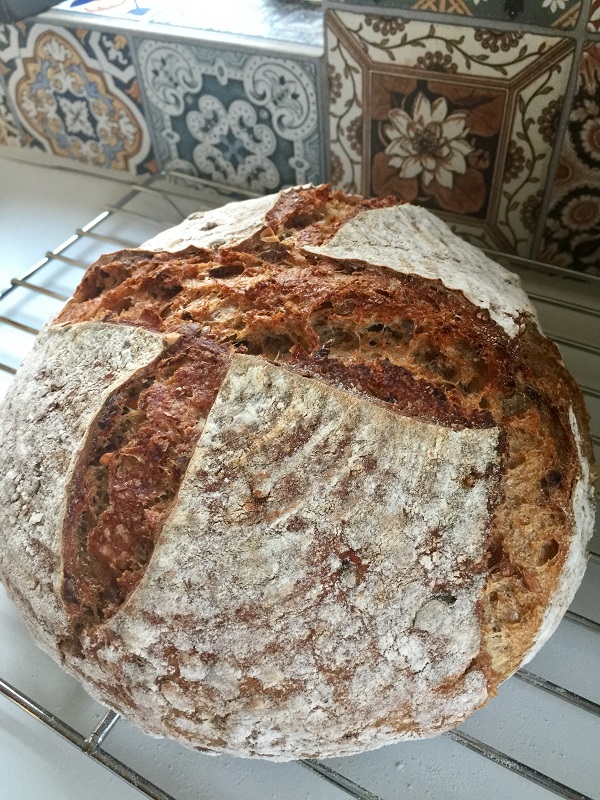
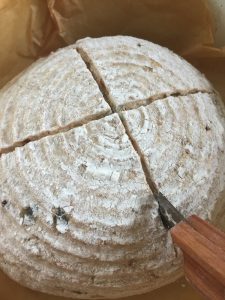
This is how it looks after the fridge, it has continued to rise but very slowly this is known as retard phase. I have an enamel casserole which I line loosely with kitchen paper then invert over the banneton and turn over and it comes out like this into the main part of the casserole. Then using a razor blade or very sharp knife (I have a blade inserted into wood called a lame) cut into the top about 1/4 inch deep this allows it to expand in cooking.
Put on the lid and bake for 50 minutes on 230C. You can also bake for another 5 or 10 minutes with lid off if you want it browned further.
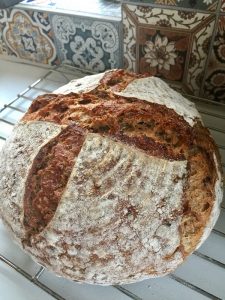
Cool on a wire rack and leave to cool before cutting. I usually cut in half and then into quarters.
Sorry, the comment form is closed at this time.